Introduction
Google Cloud offers a free-tier virtual machine (VM) that allows you to run a server at zero cost forever. This guide will walk you through the step-by-step process of creating a Google Cloud account, setting up a free VM, and configuring it properly to ensure you get the most out of the free tier.
By the end of this tutorial, you'll have a fully functional e2-micro instance with a static IP, ready for hosting applications, development, or personal projects—all without worrying about unexpected charges. Let's get started! 🚀
Step 1 - Create Google Cloud Account
Visit Google Cloud website to create a new account. You can using @gmail.com to use
Step 2 - Create Google Cloud Project
Visit Google Cloud Console and create your first project or choose exist project
Step 3 - Enable Virtual Machine
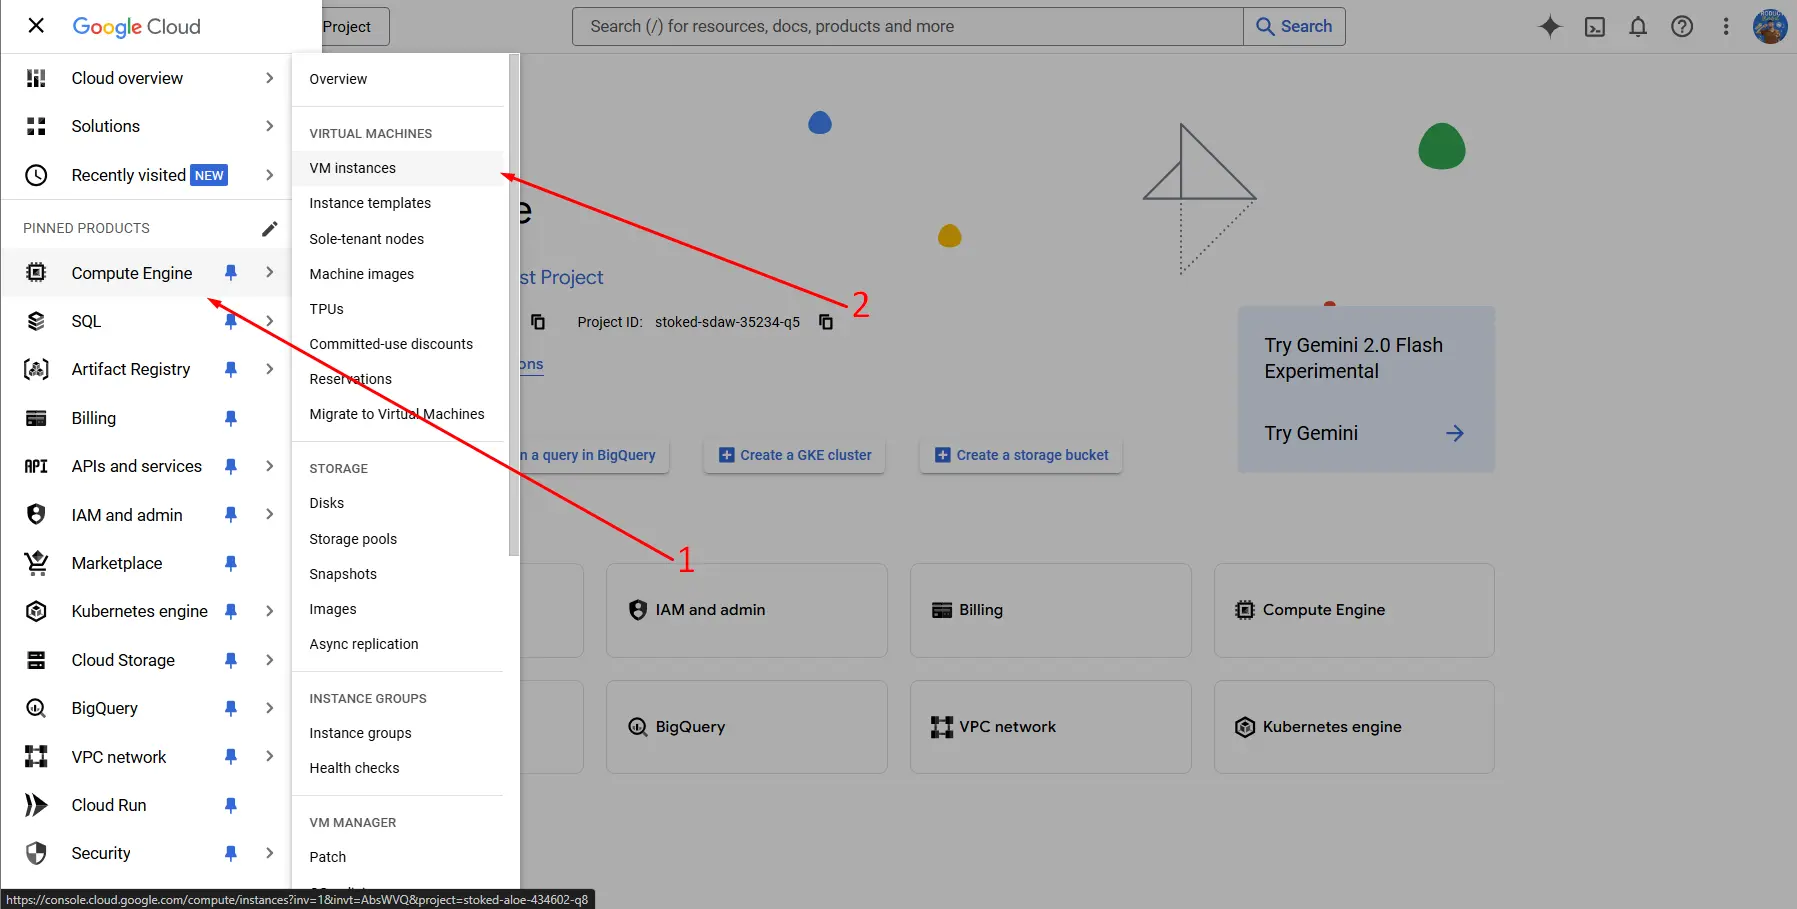
Navigate to VMs
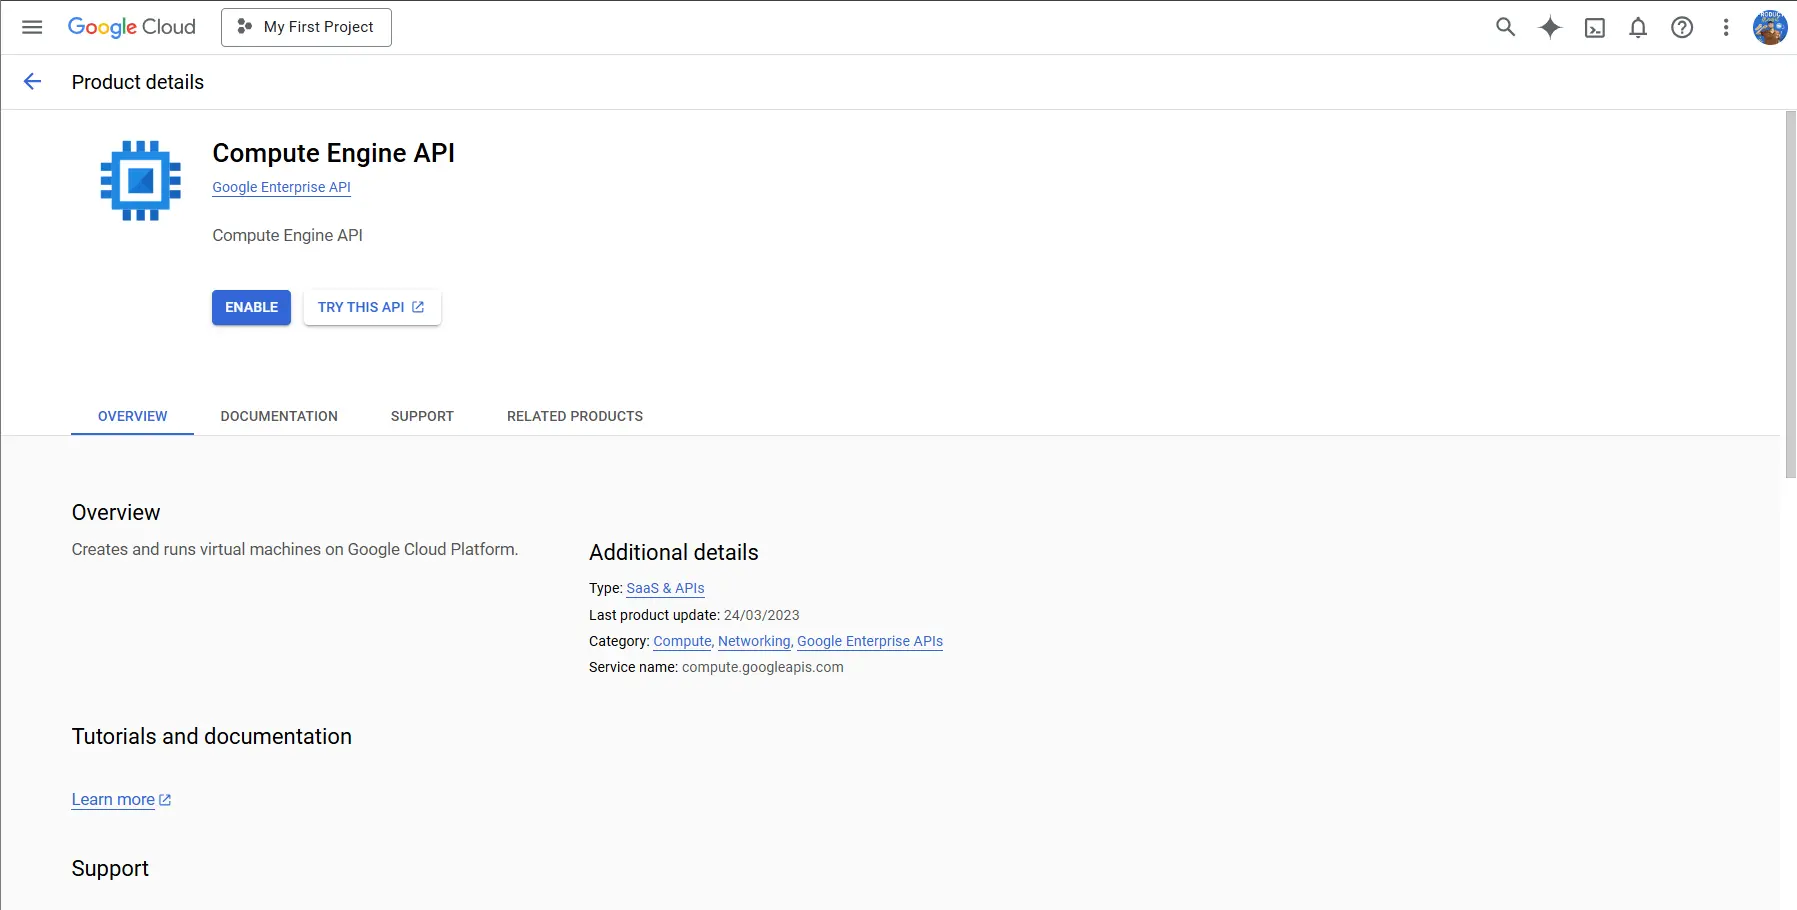
Enable the API. Don't worry, just enable it - you can use it later. This step is required only the first time.
Step 4 - Choose Free Tier VM
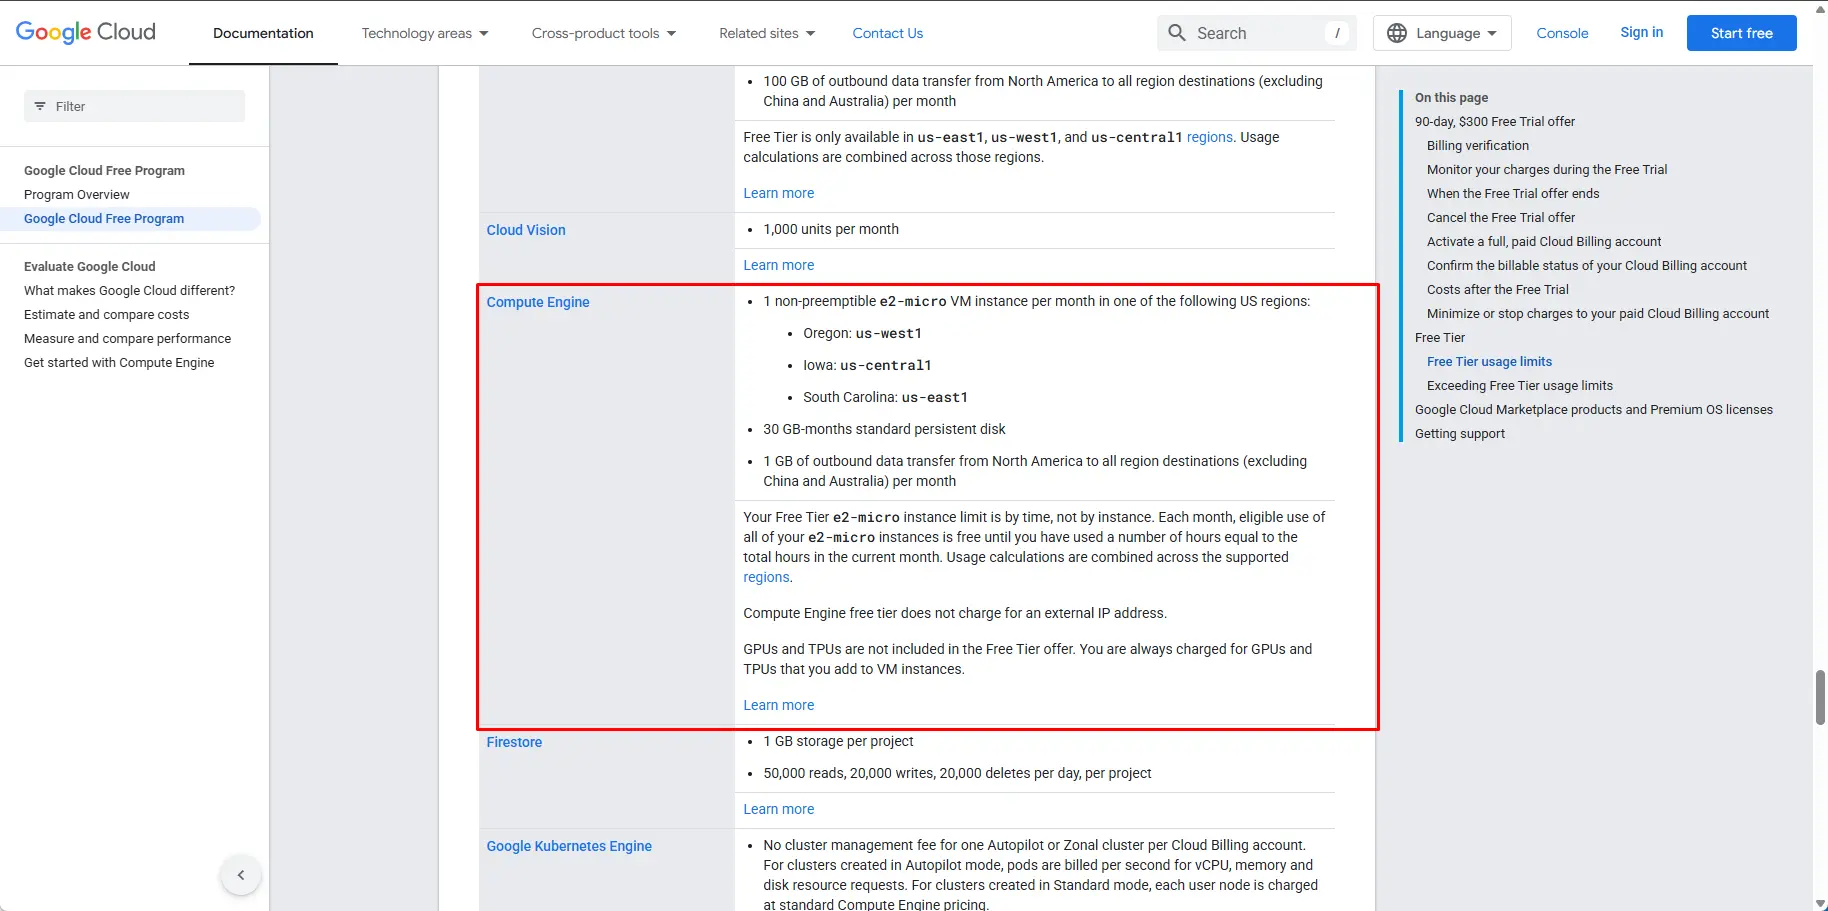
Before start, please see Google Cloud Free Tier you can see free forever configuration. We will create new instance e2-micro of lowa region and standard persistent disk
Step 5 - Create Virtual Machine
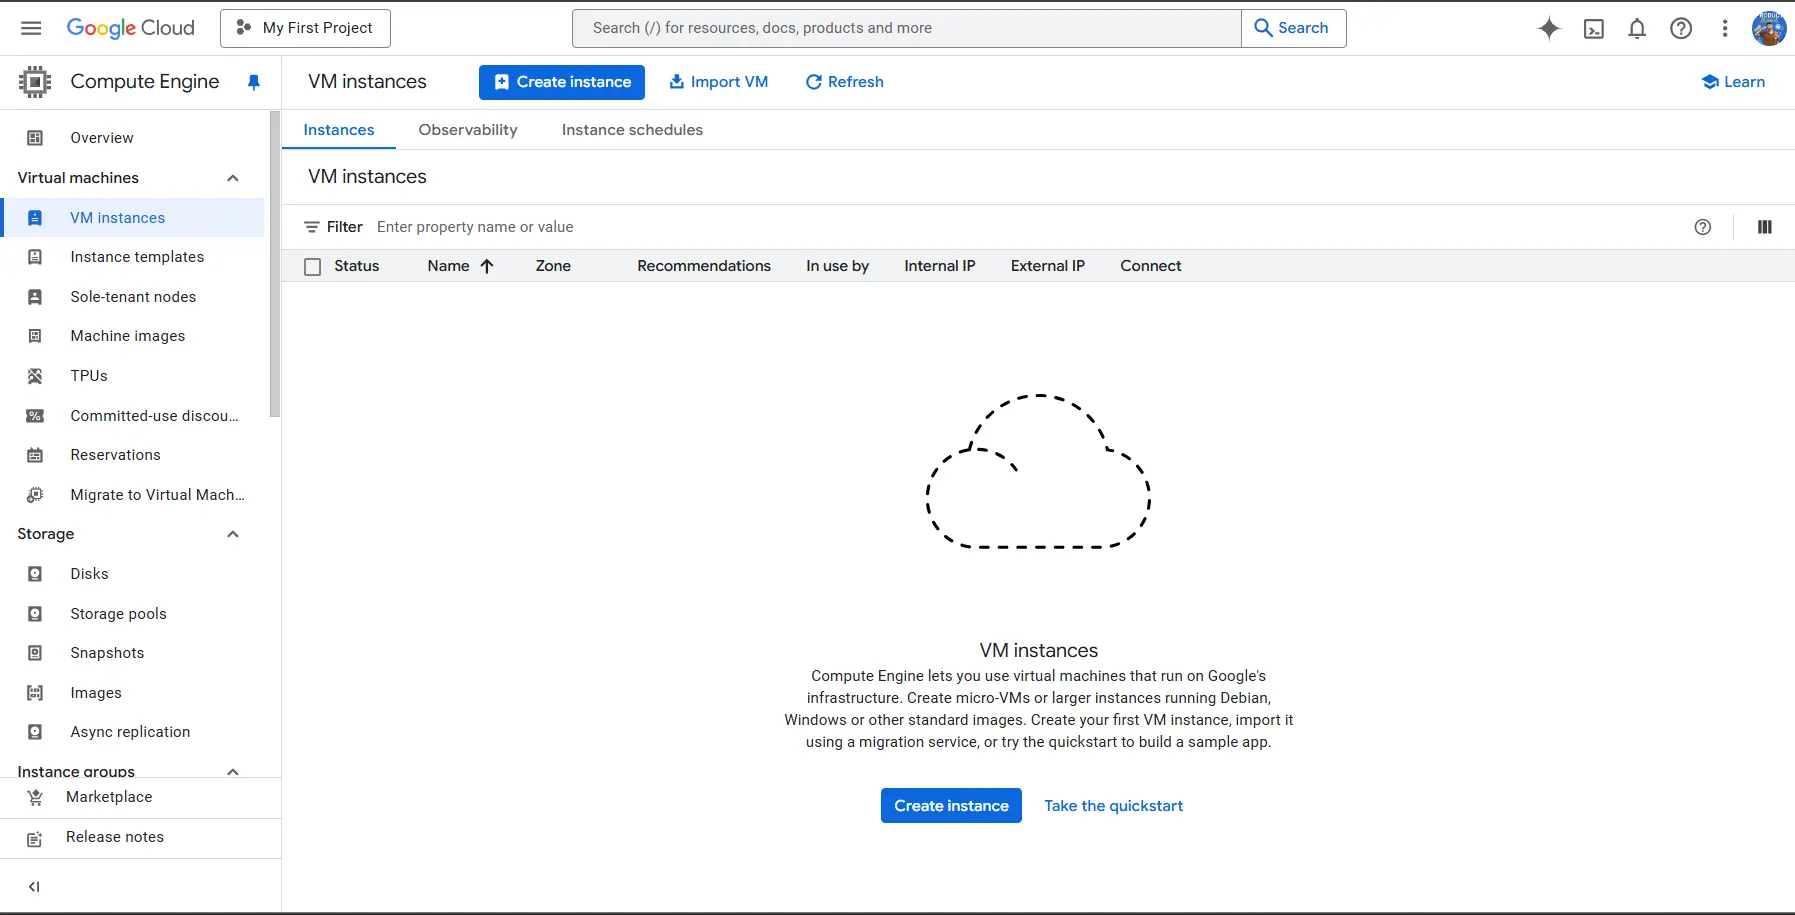
Navigate to Compute Engine, you can see button "Create instance", click it
Firstly, we will choose e2-micro instance of lowa region
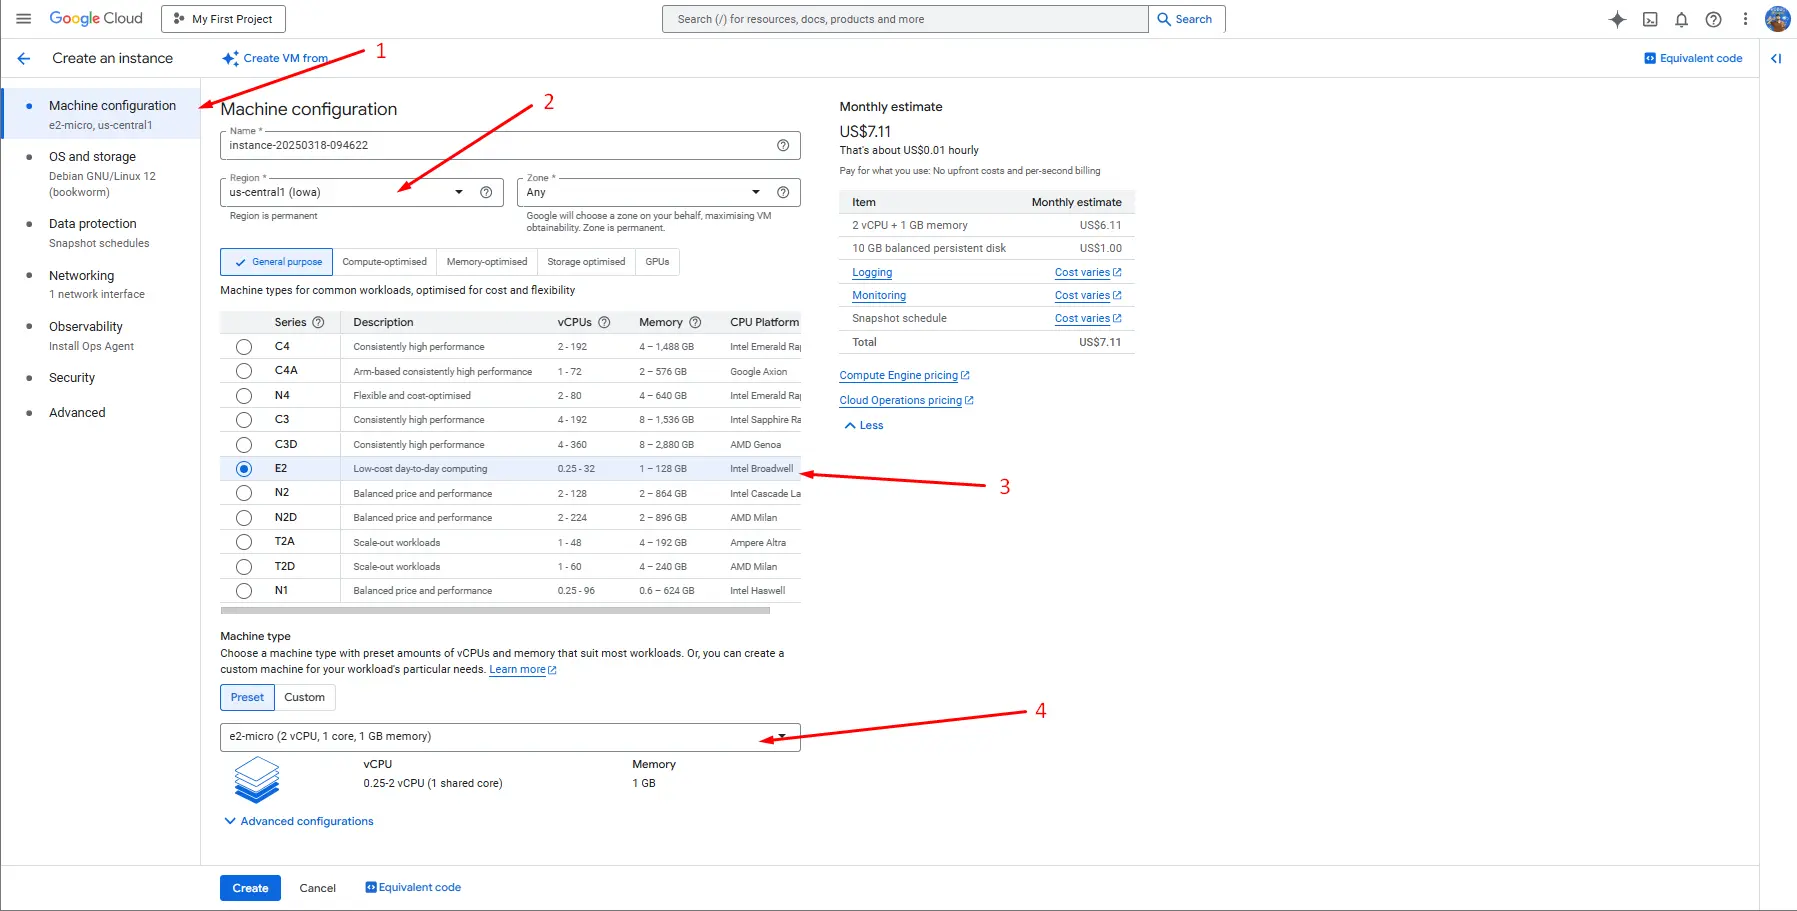
By default, Google Cloud choose Debian for OS but if in the future this default setting change, please choose Debian x86/64 to match this tutorial
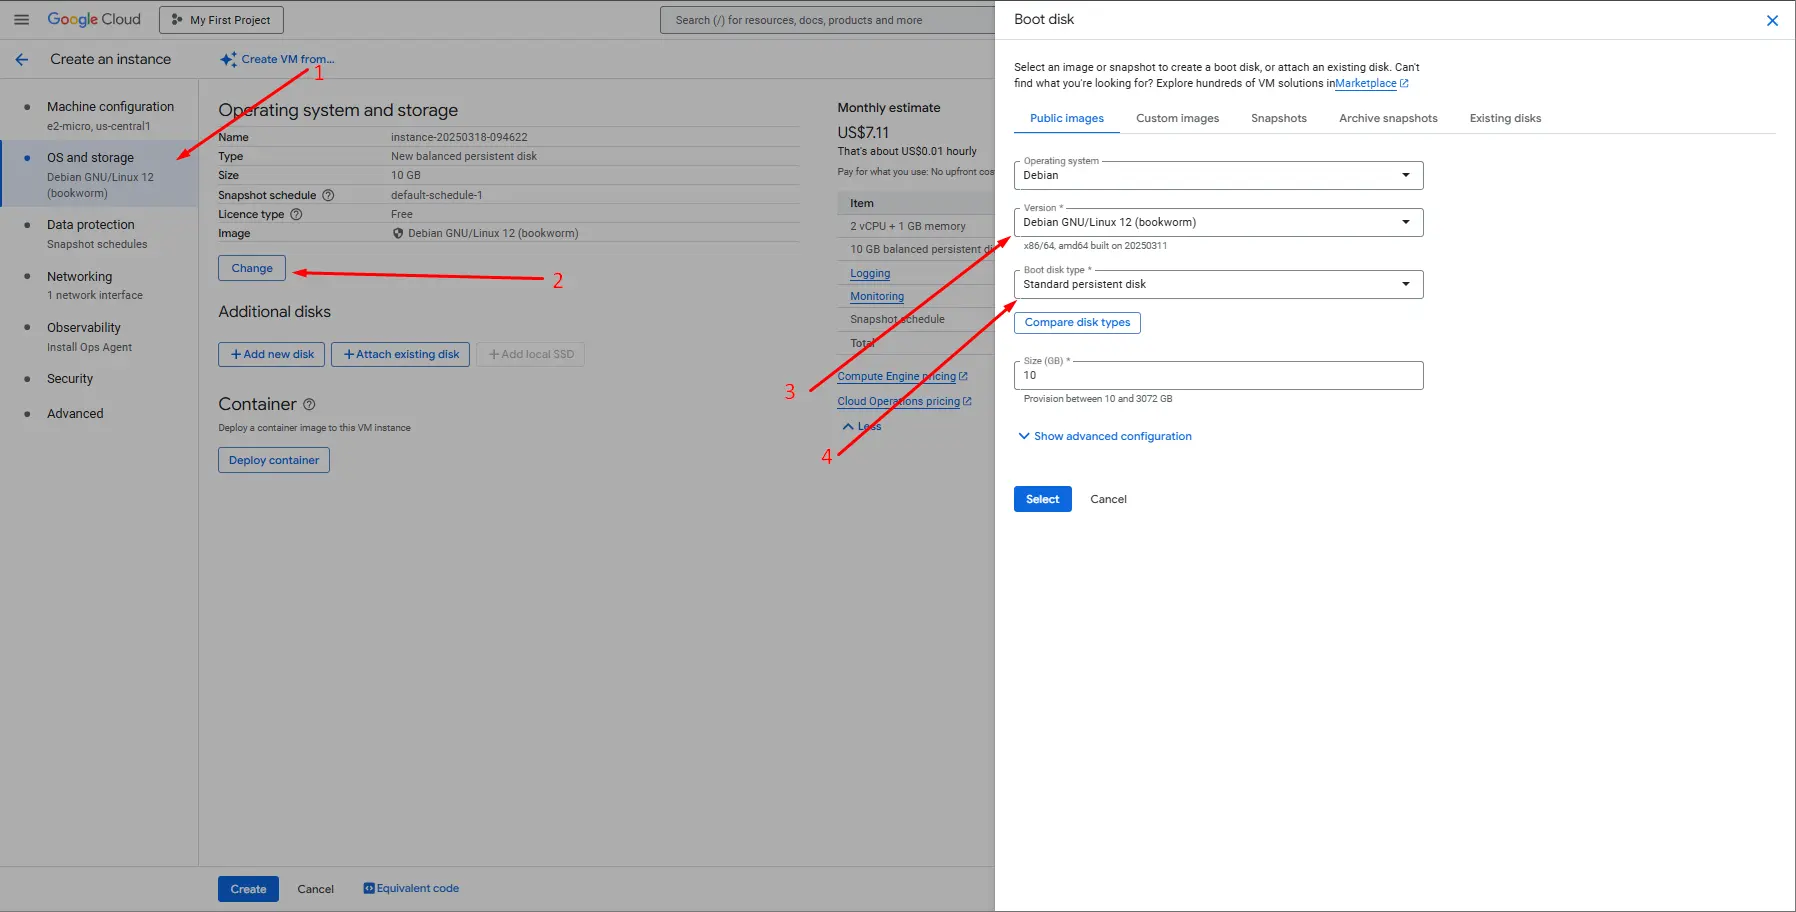
Then, we change balanced persistent disk -> standard persistent disk (HDD)
Now, you can click button "Create" in the bottom to create your own instance and wait a minute to creation process is done
Step 6 - Reserve Static IP
Click to view details of instance. By this way, you can keep your external ip without loss it.
If you want to open port for HTTP(80) and HTTPS(443) you can tick under "Firewalls" as below guide.
Conclusion
Congratulations! You've successfully set up a Google Cloud virtual machine with $0 cost forever. By following these steps, you've created an account, enabled the necessary APIs, and configured a free-tier VM with a static IP. Now, your instance is ready for deployment, whether for personal projects, hosting applications, or experimenting with cloud services.
To keep your VM running smoothly, make sure to monitor usage and stay within the free tier limits. If you need additional configurations, explore Google Cloud's features for networking, security, and automation.
Enjoy your free cloud server! 🚀